Quick Reference Guides
Conference Room Guides:
Windows Guides:
How to Update from Windows 10 To Windows 11 Using FSU’s Software Center
Conference Room A1511
Room Information
- Name: Controller’s Office 1st Floor Conference Room
- Booking Name: CTL-A1511Conf
Remote Control Hot Keys
- Home
 – Turns on the wall display.
 - Arrows
 – Navigate the wall display.
 - Select
 – Select items on the wall display.
Option 1 – Room PC
- Press Home and go to Favorites on the display. Select HDMI 1 – Room PC.
- Log in with your FSU ID.
- Log off when finished.
Option 2 – Wireless Laptop Connection
- Press Home and go to Favorites on the display. Select HDMI 2 – Wireless Screen Connect
- Connect your computer to FSUSecure Wi-Fi.
- Method 1: Windows with Miracast
- Press the Windows Key + K
 .
. - Select UCA1511AM on the Connect bar on your screen. Enter the 4-digit PIN shown on the wall display to connect your screen.
- Select Disconnect on the Miracast bar at the top of your screen when done.
- Press the Windows Key + K
- Method 2: Wireless Laptop Connection
- Open a browser and enter http://10.21.64.3 into the navigation bar.
- Click Start Presenting. Then, choose the Connect with Airmedia App option on the following screen.
- Click the Windows icon at the bottom of the screen. Then, download and open the app.
- Click Agree, then Deny when prompted.
- Enter the 4-digit PIN shown on the wall display in the app and click Connect.
- To disconnect, open the Airmedia App from your taskbar and select Disconnect.
Option 3: HDMI Cable Connection
- Press Home and go to Favorites on the display. Select HDMI 3 – Direct Connection.
- Plug the HDMI cable (on the table) into your laptop.
- Unplug and return the cable neatly when finished.
Conference Room A2206
Room Information
- Name: Controller’s Office 2nd Floor Conference Room
- Booking Name: CTL-A2206Conf
Using the Table Control Screen
- Display On – Use at beginning of meeting to start display.
- Display Off – Use after meetings to end display.
- AV Mute – Temporarily hides the screen.
- System Reset – Restarts display, if needed.
- Volume Up
- Volume Down
- Main Volume Knob – Adjusts main room volume.
Wall Display Input Options
- Tap the touchscreen to select an input. The touchscreen will light up green.
- Cubby 1 HDMI – Located near control screen. Press release and connect to laptop.
- Cubby 2 HDMI – Located at other end of the table. Press release and connect to laptop.
- Room PC – Use wireless keyboard/mouse in conjunction with display. Tap to wake, login, and use. Sign out when finished. Teams/Zoom Info Setup for Room PC: Speaker/Mic – Echo Canceling Speakerphone; Camera: Huddly IQ.
Wireless Screen Sharing
- Method 1: Windows with Miracast (Recommended)
- Connect to FSUSecure Wi-Fi.
- Press the Windows Key + K
 .
. - Select UCA2206AM on the Connect bar on your screen. Enter the 4-digit PIN shown on the wall display to connect your screen.
- Select Disconnect on the Miracast bar at the top of your screen when done.
- Method 2: Crestron Air Media App
- Open a browser and enter http://10.21.64.4 into the navigation bar.
- Click Start Presenting. Then, choose the Connect with Airmedia App option on the following screen.
- Click the Windows icon at the bottom of the screen. Then, download and open the app.
- Click Agree, then Deny when prompted.
- Enter the 4-digit PIN shown on the wall display in the app and click Connect.
- To disconnect, open the Airmedia App from your taskbar and select Disconnect.
Option 3: HDMI Cable Connection
- Press Home and go to Favorites on the display. Select HDMI 3 – Direct Connection.
- Plug the HDMI cable (on the table) into your laptop.
- Unplug and return the cable neatly when finished.
Conference Room A5626
Room Information
- Name: Controller’s Office 5th Floor Conference Room
- Booking Name: CTL-A5626Conf
Remote Control Hot Keys
- Source –
 Turns on the wall display.
 - Arrows – Navigate the wall display.
- Select - Select items on the wall display.
Option 1 – Room PC
- Press the Source button. Use the arrows to select HDMI 1 – Room PC.
- Log in with your FSU ID.
- Log off when finished.
Option 2: HDMI Cable Connection
- Plug the HDMI cable (on the shelf below the wall display) into your laptop.
- Press the Source button on the remote.
- Use the arrows to select HDMI Direct – HDMI 2. This will display your screen.
- When finished, disconnect the HDMI cable and return it neatly to the shelf.
Conference Room A6302
Room Information
- Name: Controller’s Office 6th Floor Conference Room
- Booking Name: CTL-A6302Conf
Cable Cubby Locations
- Cubby Box 1 – At the end of the table, farthest away from the screens.
- Cubby Box 2 – Middle of table.
- Cubby Box 3 – Closest to screens at end of table.
Turning on Screens
- Open the lid of Cubby Box 1 to turn on the Table Control screen.
- Press the Power button at the top right of the Table Control screen. The indicator light will change from red to green. The screen will take a few moments to display images.
- If the screen appears blank or incorrect, drag the Table PC 1 icon to the left display and the Table PC 2 icon to the right display as seen below.
- Turn off when finished. When prompted to power down the displays, click Yes. The indicator light will turn from green to red.

Using the PC
- Make sure the cordless keyboard and mouse are turned on.
- Shake the mouse or tap the spacebar to wake the PC.
- Log in with your FSU credentials. The screen operates in a dual-screen extended desktop mode.
- Log out when finished.
- Flip the lid of Cubby Box 1 to its original position.
Using the Soundbar (If Needed)
- Press the Power button on the sound bar remote while facing the sound bar. LED lights on the left side of the sound bar indicate that power is on.
- Use volume keys on the cordless keyboard to adjust sound. Note: The sound bar only plays audio from content on the left screen.
- Turn off when done using.
Displaying a Guest Laptop via HDMI
- Connect the guest laptop to an HDMI cable from Cubby Box 1, 2, or 3.
- On the Table Control screen, drag the corresponding Cubby Box icon to the desired left or right display.
- Disconnect the laptop when done.
Need Help with Additional Equipment?
- Webcam equipment is available on request. Please contact Mark Heuer – heuer@admin.fsu.edu.
How to Update from Windows 10 To Windows 11 Using FSU’s Software Center
This guide is intended for FSU staff currently using Windows 10 who would like to manually update to Windows 11.
On October 14, 2025, Microsoft will end support for Windows 10. FSU has adopted Windows 11 as the official replacement. As Oct. 14th approaches, FSU System Center Updates will send a forced update to Windows 11. This can be a very long process and may occur at a time that you may not choose.
Below is a guide to manage your own update before 10/14/2025. To find out which version of Windows you are using, type "winver" in the Microsoft search bar and run the command.
If you would prefer to be assisted in the update process, please email: CTL-IT-Support@fsu.edu, and an appointment will be scheduled.
Windows 10 to Windows 11 Update Steps:
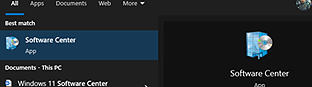
1. Click the Search Bar in the bottom left of your screen. Type Software Center and open it.
2. In Software Center, click Updates on the left side.

3. Look for Upgrade to Windows 11 (Business Edition) en-us x64.
- Don’t see it? Email: CTL-IT-Support@fsu.edu for help.

4. Click the upgrade. Then, click Install.

5. A pop-up will ask you to confirm. Click Install again.
6. You can track progress in the green Status bar.
- You may keep working while it installs. This could take several hours.

7. When prompted, save your work and click Restart Now, then OK.

8. After restart, the upgrade may take 30+ minutes and multiple reboots.
- You can’t use your device during this time.

9. When done, you’ll see the new Windows 11 login screen. Log in as usual with your FSUID and password.
10. You’ll see Getting Things Ready briefly, then your new Windows 11 desktop screen. Future logins will be faster.